Sunday, November 18, 2012

Apricot Almond Coffee Cake

It's been a little quiet here on the blog for the last week or so. I was in Virginia for a few days on a work trip, then I laid low at home and relaxed for a couple nights after that. Last night we had a couple of our good friends over for dinner and games, then we all headed to a local comedy club for a show. It was really fun but I can definitely tell I'm getting old because my friend Shayna and I both started falling asleep at the comedy club! It wasn't because the comedian wasn't funny, we just couldn't keep our eyes open! Talk about not getting out much...haha


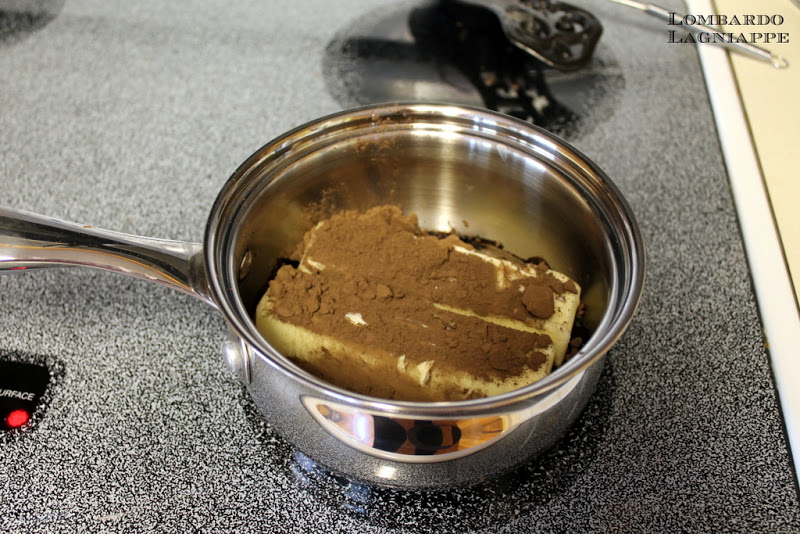
Today I'm looking forward to the short work week, and of course, to Thanksgiving! I love any holiday that involves a big tasty meal! (Which is basically all of them, right?) I spent part of my day today making my contribution to the Thanksgiving food, though I hadn't actually planned on doing it today. There was a little bit of a mistake when I started this recipe today. I bought the ingredients to make 2 batches of this cake, one as a large bundt cake to bring to Thanksgiving, and one to split between 4 mini, disposable tube pans to give as gifts to our neighbors. It wasn't til I was about ready to bake the cake that realized something was just not right. The batter was way thicker than I remembered it being the last time I made it. So I looked back at the ingredient list and realized that instead of 2 sticks of butter, I added 2 cups of butter (4 sticks). Ugh. I ended up just adding all the other ingredients a second time and mixing it all together. Luckily it seemed to work just fine! This cake was one of our favorites growing up, and it's great any time of day. Since it's called a coffee cake, it obviously qualifies as a breakfast food. But it could also be a dessert or a snack cake since it even has fruit! (Apricot preserves are totally fruit.) I don't have any "process" pictures because my camera battery died, but that's probably a good thing since I messed up the process anyway. Here's the recipe!


Apricot Almond Coffee Cake
From Southern Sideboards, a Jackson, Mississippi Junior League Cookbook


1c. butter
2c. sugar
2 eggs
1c. sour cream
1t. almond extract
2c. flour
1t. baking powder
1/4t. salt
1c. sliced almonds,divided
10oz. jar apricot preserves


Preheat oven to 350 degrees.

- In the bowl of a stand mixer (or in a large bowl and using a hand mixer) cream butter and sugar until fluffy.
- Beat in eggs to the sugar and butter, one at a time.
- Fold in the sour cream and almond extract.
- Mix together the flour, baking powder and salt, fold in also.
- Place about one-third of the mixture in a greased and floured bundt pan. Sprinkle ½ cup of almonds and spread half of the apricot preserves over the batter.
- Add the remaining batter. Top with the remaining almonds and preserves. Bake at 350 degrees for one hour or until done.
- Cool on a rack for about 15 to 20 minutes before turning out onto a plate.

* When filling the mini pans, I found it hard to spoon the batter in without getting it all over the sides. So I scraped all the batter into a gallon ziploc, then cut off a corner so there was about a 3/4" opening. I then squeezed two rounds of batter into each pan and smoothed it out with a little spatula. It made the whole process so much quicker and easier.


* Recipe may be varied by substituting vanilla for the almond extract and a mixture of 1 cup chopped pecans, 4 tablespoons brown sugar and 2 teaspoons cinnamon for the apricot preserves and almonds.


I was really excited to finally use these little disposable pans since I got them several months ago on clearance. I've seen ones like it at baking stores and even Michael's or Hobby Lobby. They're great for giving things like cakes without having to worry about getting your pan back. The cakes just BARELY fit in the little Thanksgiving treat bags that I got yesterday at Hobby Lobby. Oh, and Hobby Lobby already has all their Thanksgiving stuff marked 80% off, so I got a pack of 20 bags for only 40 cents! I'm a complete sucker for holiday themed treat bags for some reason. I've got tons of them, but this time I actually used them! haha


I guess that's it for tonight. I seriously cannot express how excited I am to only have 2, maybe 2.5 days of work this week! It's gonna be sooooo great! I hope you all have a nice short week too and a very Happy Thanksgiving! I've got one more post planned for between  now and then with a recipe that could help you use up some left over turkey, so be on the look out!

Sunday, November 11, 2012

Chocolate Sheet Cake and The Pioneer Woman

I mentioned in my last post that I had a little brush with blogging fame. One of the blogs I regularly read is written by the Pioneer Woman (Ree Drummond) and she blogs about her life on a cattle ranch and all the delicious food she makes for her family and ranch hands. Since starting her blog, she has turned it into a career and now has two cookbooks, two children's books, and a Food Network show. One day on her blog, she was talking about her upcoming book tour for the children's book she just released, called Charlie and the Christmas Kitty, and it just so happened that one of her stops would be in Kansas City.  (Charlie is their basset hound that has quite the personality.) Since I already had one of her cookbooks, I decided that I had to go meet her and get it signed! Joe was out of town last weekend so I didn't mind spending a few hours waiting to get my book signed.

I went down to the Plaza, bought my ticket (which included a copy of the new kids book) and waited for the Pioneer Woman to arrive. She came out on stage and gave a short presentation before beginning to sign books. What I didn't realize was that the signing would be done in the order of when the tickets were bought. Mine was 316! I waited for about 4 hours to get my 30 seconds of time with Ree, but I guess I can say it was worth it. She was very sweet and I told her that I love her blog and make her bruschetta all the time and everyone loves it. Then she signed my book, we took a picture, and I went on my way.


And since I'm telling y'all about the Pioneer Woman today, I figured I could also share a recipe from her blog and cookbook. The recipe is for a large chocolate sheet cake that I've also heard referred to as a Texas sheet cake. It is a simple, delicious, chocolate cake topped with a simple, delicious chocolate icing. I might have under cooked by a little, but it still all got eaten when I brought it into work. Here's the recipe:


Chocolate Sheet Cake
From The Pioneer Woman

For the Cake:
2 cups all purpose flour
2 cups sugar
1/4 teaspoon salt
1/2 cup buttermilk
2 large eggs
1 teaspoon vanilla
1 teaspoon baking soda
2 sticks butter
4 heaping tablespoons cocoa powder

For the Icing:
1 3/4 sticks butter
4 heaping tablespoons cocoa powder
6 tablespoons milk
1 teaspoon vanilla
1 pound powdered sugar
1/2 cup chopped pecans (optional)


- Preheat the oven to 350 degrees.
- In a large bowl, combine the flour, sugar and salt. Stir together and set aside. (I also added powdered buttermilk to this since I wasn't using regular buttermilk.)


- In another bowl, mix the buttermilk, eggs, vanilla and baking soda. Mix with a fork and set aside. (I mixed 1/2 cup water in to take the place of the buttermilk, per the instructions on the powdered buttermilk container).


- In a medium saucepan, melt the butter and add the cocoa.


- Whisk together to combine. Meanwhile, bring 1 cup water to a boil.
- When the butter is melted and the cocoa is mixed in, pour the boiling water in the pan. Allow to bubble for moment, then turn off the heat.


- Pour the chocolate mixture into the flour mixture. Stir together for a moment to cool the chocolate, then pour in the egg mixture.


- Stir or whisk together until smooth, then pour into an ungreased jelly roll pan (11"x15") and bake for 20 minutes.


While the cake is baking, begin making the icing since you'll pour it on right after taking the cake out of the oven.

- Melt the butter in a saucepan over medium-low heat. Add the cocoa powder and stir until smooth. Add the milk and vanilla. Add the powdered sugar and stir or whisk until smooth. If using pecans, add them after mixing in the sugar. After taking the cake out of the oven, immediately pour the icing over the cake. Try and pour it evenly to avoid having to spread it around. If needed, use a spatula to fill in any gaps. Let cool, and enjoy!


This cake really is delicious and you may find yourself just standing over the pan with a fork. I'm just warning you! I hope you all have had a nice weekend and wish you an even nicer week :)


Monday, November 5, 2012

Two Halloween Cakes

I know it's well past Halloween now, and honestly I didn't even want to put these on here because they're not my best work. But I figured It would be best to show all my cakes, not just the ones that I'm actually happy with. I had high hopes for both these cakes, but the time that I gave myself to make them was not nearly enough, and I ran into a couple other problems as well. First up the pumpkin cake.

I used 2 bundt cakes. The top was spice cake with pumpkin filling and the bottom was chocolate cake with coconut filling.

I wanted to make a cake for Joe to take to work for Halloween. This cake should have been simple enough since I've made a similar one before. The only difference was that this time I decided to cover the cake in fondant and that is where my main problem was. I just could not get it rolled out smooth! I kneaded it for what felt like forever and it still didn't soften up very well. So when I tried to roll it out and place it over the cake, it kept cracking. After three tries, I decided that I didn't care if it cracked. I'd just patch it up as best as I could. The color of the fondant was also a little off, and the cake didn't show the ridges as well as I'd hoped, so I ended up hand painting the entire thing. In a last ditch effort to make it look somewhat like a pumpkin, I formed a stem and vine (a really ugly vine) out of fondant and hand painted them too. Then I painted on a face and threw my hands up in surrender!


See the cracked and folded fondant? yuck. Not quite as yucky as that snaky vine though, haha!


The assembly and decorating of that cake was all done on Monday night, which left me ONE night (Tuesday) to bake and decorate a cake for my work's potluck on Wednesday. I'd been planning on a 3 tiered cake; 9", 7", and a 6" pumpkin. After my failed pumpkin on Monday, I was not looking forward to trying again, especially since I'd be using more of the same fondant that was giving me trouble. But I persevered and baked my cakes, made the icing and started the assembly. One good thing about both these cakes is that I was using some filings I had frozen from when I made the cupcakes for the wedding cake tasting, so that was a little bit of a time saver.

I had a much easier time with this pumpkin, but didn't take any process shots.

The orange fondant actually worked pretty well this time, but another problem popped up. I decided to make a Swiss meringue buttercream since I thought I could get a sharper edge on the cakes. The problem was that when I tried to dye part of the icing orange, it would NOT turn bright orange! I swear I dumped 1/2 a small bottle of good orange food coloring into it and it just wouldn't go past pastel orange. I don't know what the deal was. I also couldn't get the yellow to turn a nice bright color, but that I could deal with a little better than a pastel orange. Anyway, I worked around it and just used the pastel orange as my crumb coat. In the end it worked out ok and I just added some candy corns to hide my cake seams. I ended up being pretty happy with it and everyone at work seemed happy as well. I guess that's enough complaining for tonight. If you made it all the way through, then thanks for reading and I hope you have a great night!

Bottom tier: Chocolate cake w/ coconut filling
Middle: Spice cake with pumpkin filling
Top: Yellow cake with caramel filling

Saturday, November 3, 2012

Cinnamon Swirl Pumpkin Pancakes

Okay. I promise that this, THIS is the last pumpkin recipe. Well, probably. I guess I shouldn't really make any promises since as far as I'm concerned, pumpkin is fair game until Thanksgiving. Plus I've still got a few cans of pumpkin in the pantry, so who knows what will happen. The great thing about this recipe though, is that it's really not about the pumpkin. The pumpkin is just a welcome guest at the pancake party. But he's not necessary to make the party a success. The real center of attention is the cinnamon swirl, and it can be invited to any pancake party, pumpkin or not. You can even add it to pancakes made with boxed or bottled mix to make them extra special. That's what I do!


The mix of softened butter, brown sugar and cinnamon, swirled onto the uncooked side of a pancake, then flipped, melts and makes one side of the pancake extra delicious with a perfect crispy ring where the butter kind of fries the swirl. Did that make sense? Just make them and you'll understand.

Here's what you'll need:

not pictured: milk and sugar. oops :)

Pancakes:
your usual pancake ingredients or mix
pureed pumpkin
vanilla
sugar
milk
(I like to add a spoonful of sugar and a splash of vanilla to my boxed pancake mix batter.)

Cinnamon Swirl:
1/2 stick of butter; softened
1/3 cup brown sugar
1/4 t cinnamon (I actually used pumpkin pie spice)

- First, mix up your favorite pancake mix as you usually would. If you're using a boxed mix, then adding about a tablespoon of sugar and a teaspoon of vanilla will make them extra light and fluffy. I added about 1 cup of canned pumpkin to mine and ended up adding probably another 1/2 cup of milk to get the batter back to normal pancake consistency.


- In a small bowl, stir together the softened butter, brown sugar and cinnamon. If the butter isn't quite soft enough, you can microwave it for a few seconds, but you really don't want it completely melted. Just nice and soft. Once it's all mixed together, spoon it into a Ziploc baggie and snip the corner off so that the opening is about 1/4" wide.


- When the batter is ready, ladle some onto a heated griddle or skillet set on medium heat. I don't usually butter the griddle since it's pretty non-stick. But you can if you need to.

- Right after ladling out some batter, squeeze some of the butter/cinnamon mixture onto the uncooked sides of the pancakes in a swirl.


- When the pancake batter starts to bubble on the top and the butter swirl looks melty, flip the pancakes as usual. Cook until done then flip them onto a plate so you can see that beautiful cinnamon swirl. Stack them up high, then cover with syrup and enjoy! If you're feeling extra fancy, you could make cream cheese icing to spoon over the top, like you'd have on regular cinnamon rolls :)


Mmmmm, that's the buttery goodness crisping up the bottom of the pancake.

These are sooooo tasty, and even I couldn't quite finish 3 of them! It's such an easy way to fancy up some plain pancakes. AND, they freeze pretty well. Joe had already eaten breakfast when I made these so I had lots of leftovers. If you just put them in single serving baggies, you can pop them in the microwave for 20 seconds or so for a quick snack. They really don't even need syrup since one side is buttery and sugary.


I guess that's about it for tonight. I had a little brush with fame (blogging fame at least) today that I'll tell you about soon. But right now I've going to focus on the LSU, Bama game. LET'S GO TIGERS!